Battery Replacement Instructions
Step 1 – Open the case of the tracker by removing all screws, then remove all battery cells and dispose of them correctly.
Step 2– Insert new battery cells with the correct polarity – failure to do so, may result in terminal damage to the circuit board. The internal LED will start flashing.
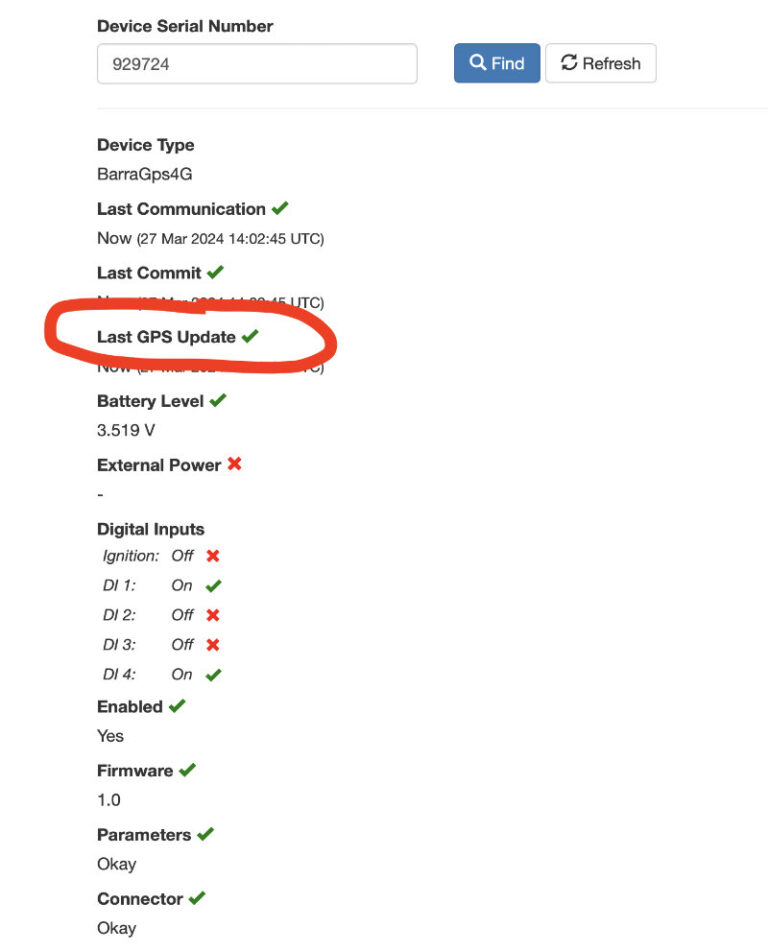
Step 3 – Go to Installer Device Check and enter the device six digit serial number.
The device will do the following:
- Connect to the server: The device will connect to our server and attempt to download fresh GPS aiding data.
- Get a GPS Fix: The device will attempt to get a GPS fix. You can speed this up by moving to an area with a good GPS signal.
- Reconnect to the server: Battery Replacement Instructions The device will attempt to connect again to upload the result of the GPS Fix.
The LED light on the device will stop flashing and go out when all activity has stopped.
Important – You want to ensure that you get a green tick against Last GPS Update before you go to step 4.
If you don’t get that green tick, you will need to re-try from step 2 (remove battery cell for at least 30 secs before re-inserting)
Step 4 – re-assemble the tracker, ensure seal is intact and screws are evenly tightened.
Here is a video guide https://youtu.be/WfLAa9_79p0